Since I had restarted this hobby, a desire to build amplifiers was getting stronger and stronger. However, due to a financial problem, the strong desire wasn't satisfied and I got frustrated everyday. As in part II, I built virtual amplifiers and tried to pretend to build real amplifiers. It was fun in the beginning but as time went by, I got more frustrated. It was just like a looking at pinup girls. They can't beat the real thing!
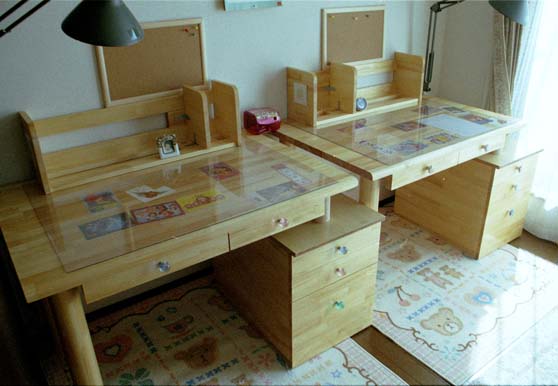
One day in February, under such situation, we went to a furniture shop to see our elder daughter's study desk because she was going to go to an elementary school coming this April. At the furniture shop there were lots of study desks from cheap one around $200 to luxury one above $1,000. We checked out middle priced one. It had real wood for the top plate and it looked very firm desk but when we saw its drawers we realized its bottom plate was very thin and delicate like a cardboard. Desks over $1,000 were really done good jobs. But they were far beyond our budget.
"OK! Shall I build one?" I told my wife half-seriously and half-jokingly. To my surprise, she replied readily "Yeah, why not?" Getting a budget for the things for our kids was much easier than that for building amplifiers. This was the beginning of my wrong way to building a next amplifier. The following two months, to get rid of the strong desire to build amplifiers, I built not only my elder daughter's desk but also my younger one's.
Well, this was a long introduction. While I was on this desk project, I looked into many web sites about how to build wooden furniture and/or about materials. I often came across the sites that introduced lumber cut service for speaker enclosures. These sites made me have another desire. "I want to build speaker systems!" Gradually, the site I looked into shifted from the wooden furniture to DIY speakers.
Intuitively, I thought if I had built speaker enclosures it would have been a "back loaded horn". Because the "back loaded horn" must have been for DIYers. Among the many website, I found Mr. Tetsuo Ngaoka's back loaded horn TYPE D-100. Tetsuo Nagaoka is the Japanese leading figure of DIY speakers. It seemed inexpensive yet its performance was highly regarded by many DIYers.
So the plan was ready. All I had to do was to negotiate with my finance ministry about the budget. Since my wife was satisfied with the result of my desk project and also my birthday was not far away, this negotiation went successfully.
April 18: At first, I only bought one 3x6 sheet of 21mm plywood. Although the original D-100 type used 15mm(about 5/8in) thick boards for all parts, I decided to use 21mm(about 7/8in) thick for side panel because I thought the heavier the enclosure was the better.
April 19: I went to Akihabara to buy speaker units and other stuff. I bought FOSTEX FF125K, speaker grill (protector), cable, terminal, and stuffing for sound absorption. The total cost for pair was about $120.
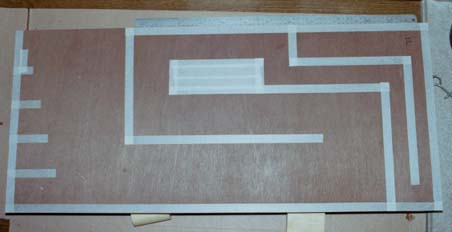
April 20 to April 24: I rubbed over the side panel with sandpaper and drew a horn pattern on the panel so that I could trace and assemble easier. Since this was done only after I went back home from work I could do only one panel at a day.
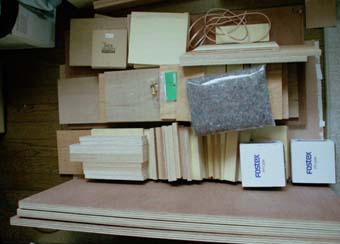
April 25: I bought a 3x6 sheet and a 3x3 sheet of 15mm plywood for the rest of the part. The number of cut was more than 70 pieces. All right! All parts were ready! I'll have ten days vacation from tomorrow! (So called Golden Week in Japan)
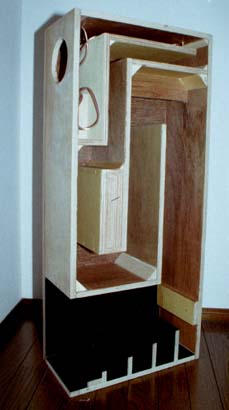
April 26: Assembling a part of horn. I used both glue and nails to fit together. There was hollow space inside the horn. The original D-100, a sound absorption was stuffed. But I filled up this space by some boards that left over.
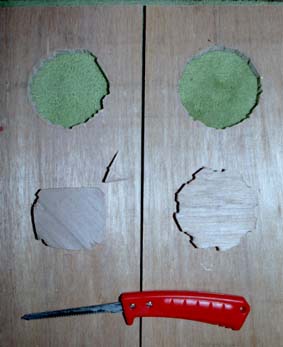
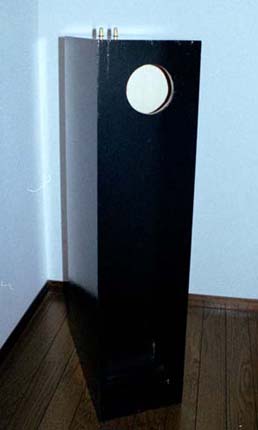
April 27: Assembling the rest part of the horn. Also I had to make 104mm holes for speaker mount by a handsaw I bought at a 100yen shop. This was more difficult than I thought. I couldn't cut along the circle line but ugly polygon. The second trial was a little bit smoother due to my poor "learning effect". I drilled more holes for handsaw than the first trial. But still I had to file off to get a perfect circle. It was the heaviest work in this project.
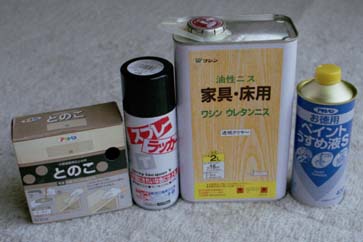
April 28: Preparations for varnish of horn road. First, I put masking tape on the panels where the glue was applied. Then polish powder was painted so that small grooves on the surface could become smoother. Actually, it was the second time for me to experience polish powder. I did very carefully because the first experience when I was a junior high student was night- mare. However again it turned out terrible!
April 29: No work today because I had to take my kids to the zoo.
April 30: Varnishing. I varnished only once on the horn road because It couldn't be seen from the outside. The horn opening was painted by black lacquer.
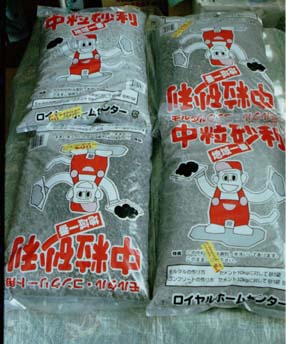
May 1: Assembling. Each sub-assembly was glued and then nailed to the side panels. Bars of triangle prism were fitted to the each corner along the horn road so that it could make the horn profile smoother. Finally, I set another side of side panel on top of the assembled part and then weighted it down with two bags of gravel for gardening. The total weight was 40kg(80lbs) for each speaker. I left them and went to four days trip to my wife's parents home.
May 5 to 9: No work. I was so exhausted.
May 10: OK! Let's move on to the painting outside. At first I sanded all surfaces by #240 papers. Because I was lazy, I rent an electric sander. It cost 300yen ($3) for one day. It was so powerful that all sanding was finished within an hour. The next step was again painting polishing powder on the surface. The "learning effect" didn't work well this time. After the surfaces dried up, I sprayed black lacquer twice.

May 11: First varnishing. I bought paintbrush at a 100yen shop. The varnishing wasn't so difficult compare to the painting polish powder. I learned a knack of varnishing during my desk project.
May 14&16: Second and third varnishing. So far, I varnished outside the door on holiday. But this time I varnished indoor late after work.
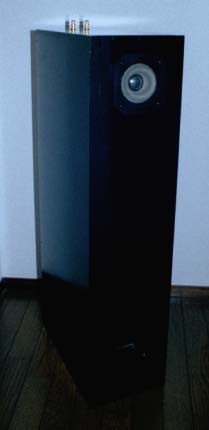
May 17: Attaching the speaker units. After soldering cable to the speaker units I screw down them to the enclosures. And the last step was to fill the bottom part of the horn with small gravel to get more stability and to cover them with felt. It's all done! Total weight was about 20kg (40lbs) per speaker.
How does it sound? : Compare to the BOSE 201 I used to use, D-100 is more bright sound. Even the power is less than 0.5w, it sounds great.
The future planLook what I got! Finally, I found it not at a dump site but my wife's parent's home. You don't see what I'm talking? Then go to PART II
